Overview
The Incident Management System is a desktop application used for managing incidents. The user interacts with it using a CLI, and it has a GUI created with JavaFX. It is written in Java, and has about 10 kLoC.
Summary of contributions
-
Major enhancement: Vehicle Management
-
What it does: Allows the user to add, edit and delete vehicles from the incident management system
-
Justification: This feature allows the system to match the needs of the target user more closely. Since the product is a Incident Management System, it makes sense to model real world situations where vehicles can be worn out and retired or bought and added.
-
Highlights: Certain commands have added restrictions to prevent user mistakes. For example, vehicle can only be deleted if it is not a dispatched vehicle.
-
-
Minor enhancement: morphed
EditCommandto edit incidents.-
Summary: Implemented EditIncidentCommand through morphing EditCommand from AddressBook-Level 3.
-
-
Minor enhancement: implemented
Incidentmodel-
Summary: Created the
Incidentmodel that simulates an incident report. -
Highlight: A unique ID for the incident report is autogenerated for every instance of a new report. This is facilitated by the
IncidentIdclass.
-
-
Code contributed: https://nus-cs2103-ay1920s1.github.io/tp-dashboard/#=undefined&search=hellopanda128 [View on RepoSense]
-
Other contributions:
-
Documentation:
-
Did cosmetic tweaks to existing contents of the README: https://github.com/AY1920S1-CS2103-T11-1/main/blob/master/README.adoc
-
-
{you can add/remove categories in the list above}
Contributions to the Developer Guide
Given below are sections I contributed to the Developer Guide. They showcase my ability to write technical documentation and the technical depth of my contributions to the project. |
Incident Edit feature
Implementation
The incident edit mechanism is facilitated by EditCommand class. Validity of user input is checked when execute() is called and an exception is thrown if invalid.
The user can choose to put in any number of fields for editing. There are 2 ways to use the “edit-i” command: 1. ‘edit-i’ without any inputs will filter the incident list to display all incidents available for editing 2. ‘edit-i’ with fields identified for editing.
An exception will be thrown under these 2 conditions:
-
index.getZeroBased() >= listOfIncidents.size() -
!incidentToEdit.equals(editedIncident) && model.hasIncident(editedIncident)
Below is an activity diagram to illustrate the process that the user may go through
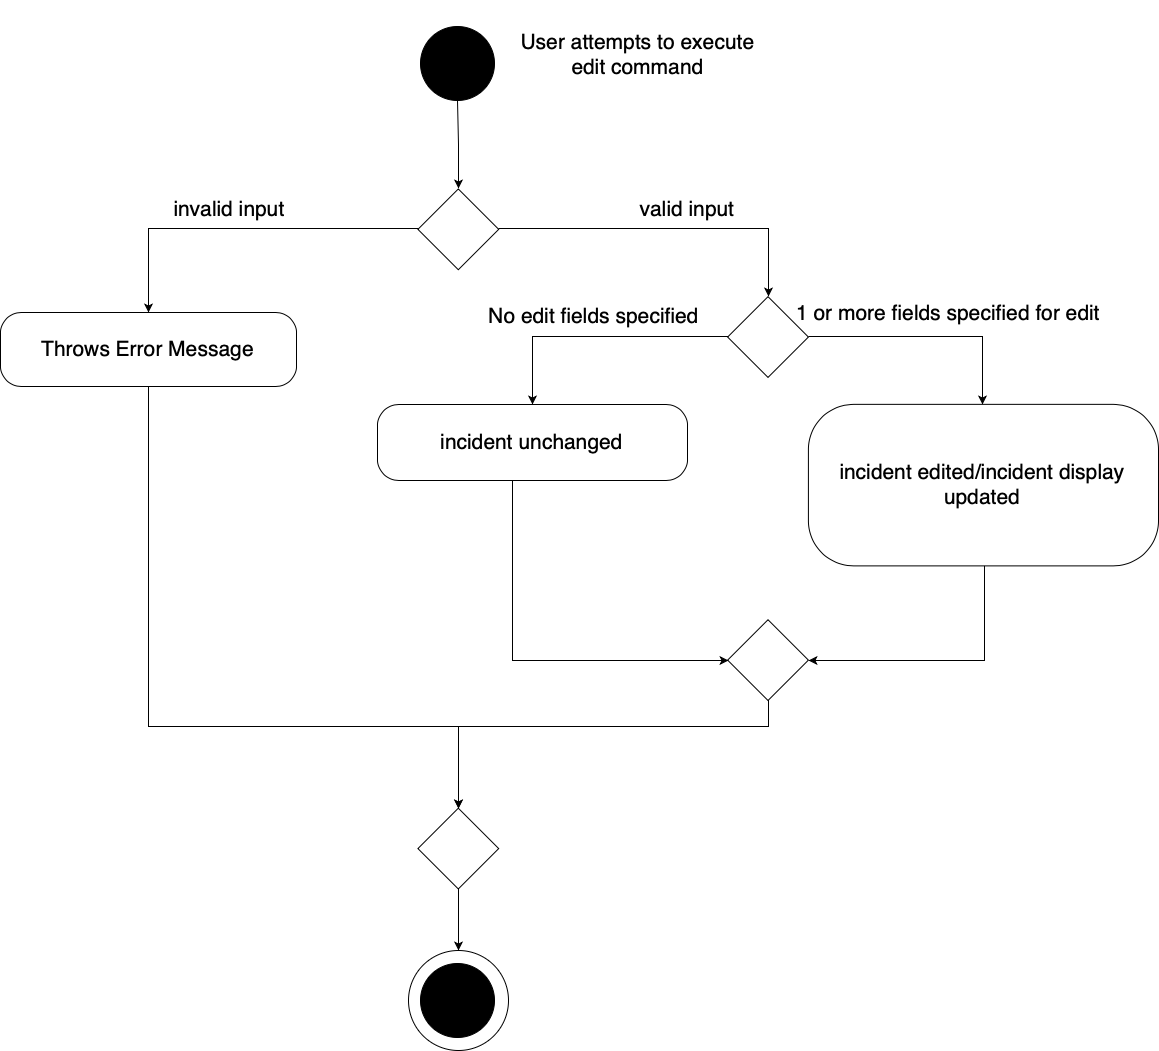
EditIncidentCommand` class makes use of EditIncident object to create a new
Incident object with the fields identified by user as well as the untouched
fields from the original incident. This new Incident will replace the original
Incident object in the incident list.
Below is a sequence diagram to illustrate how the command executes:
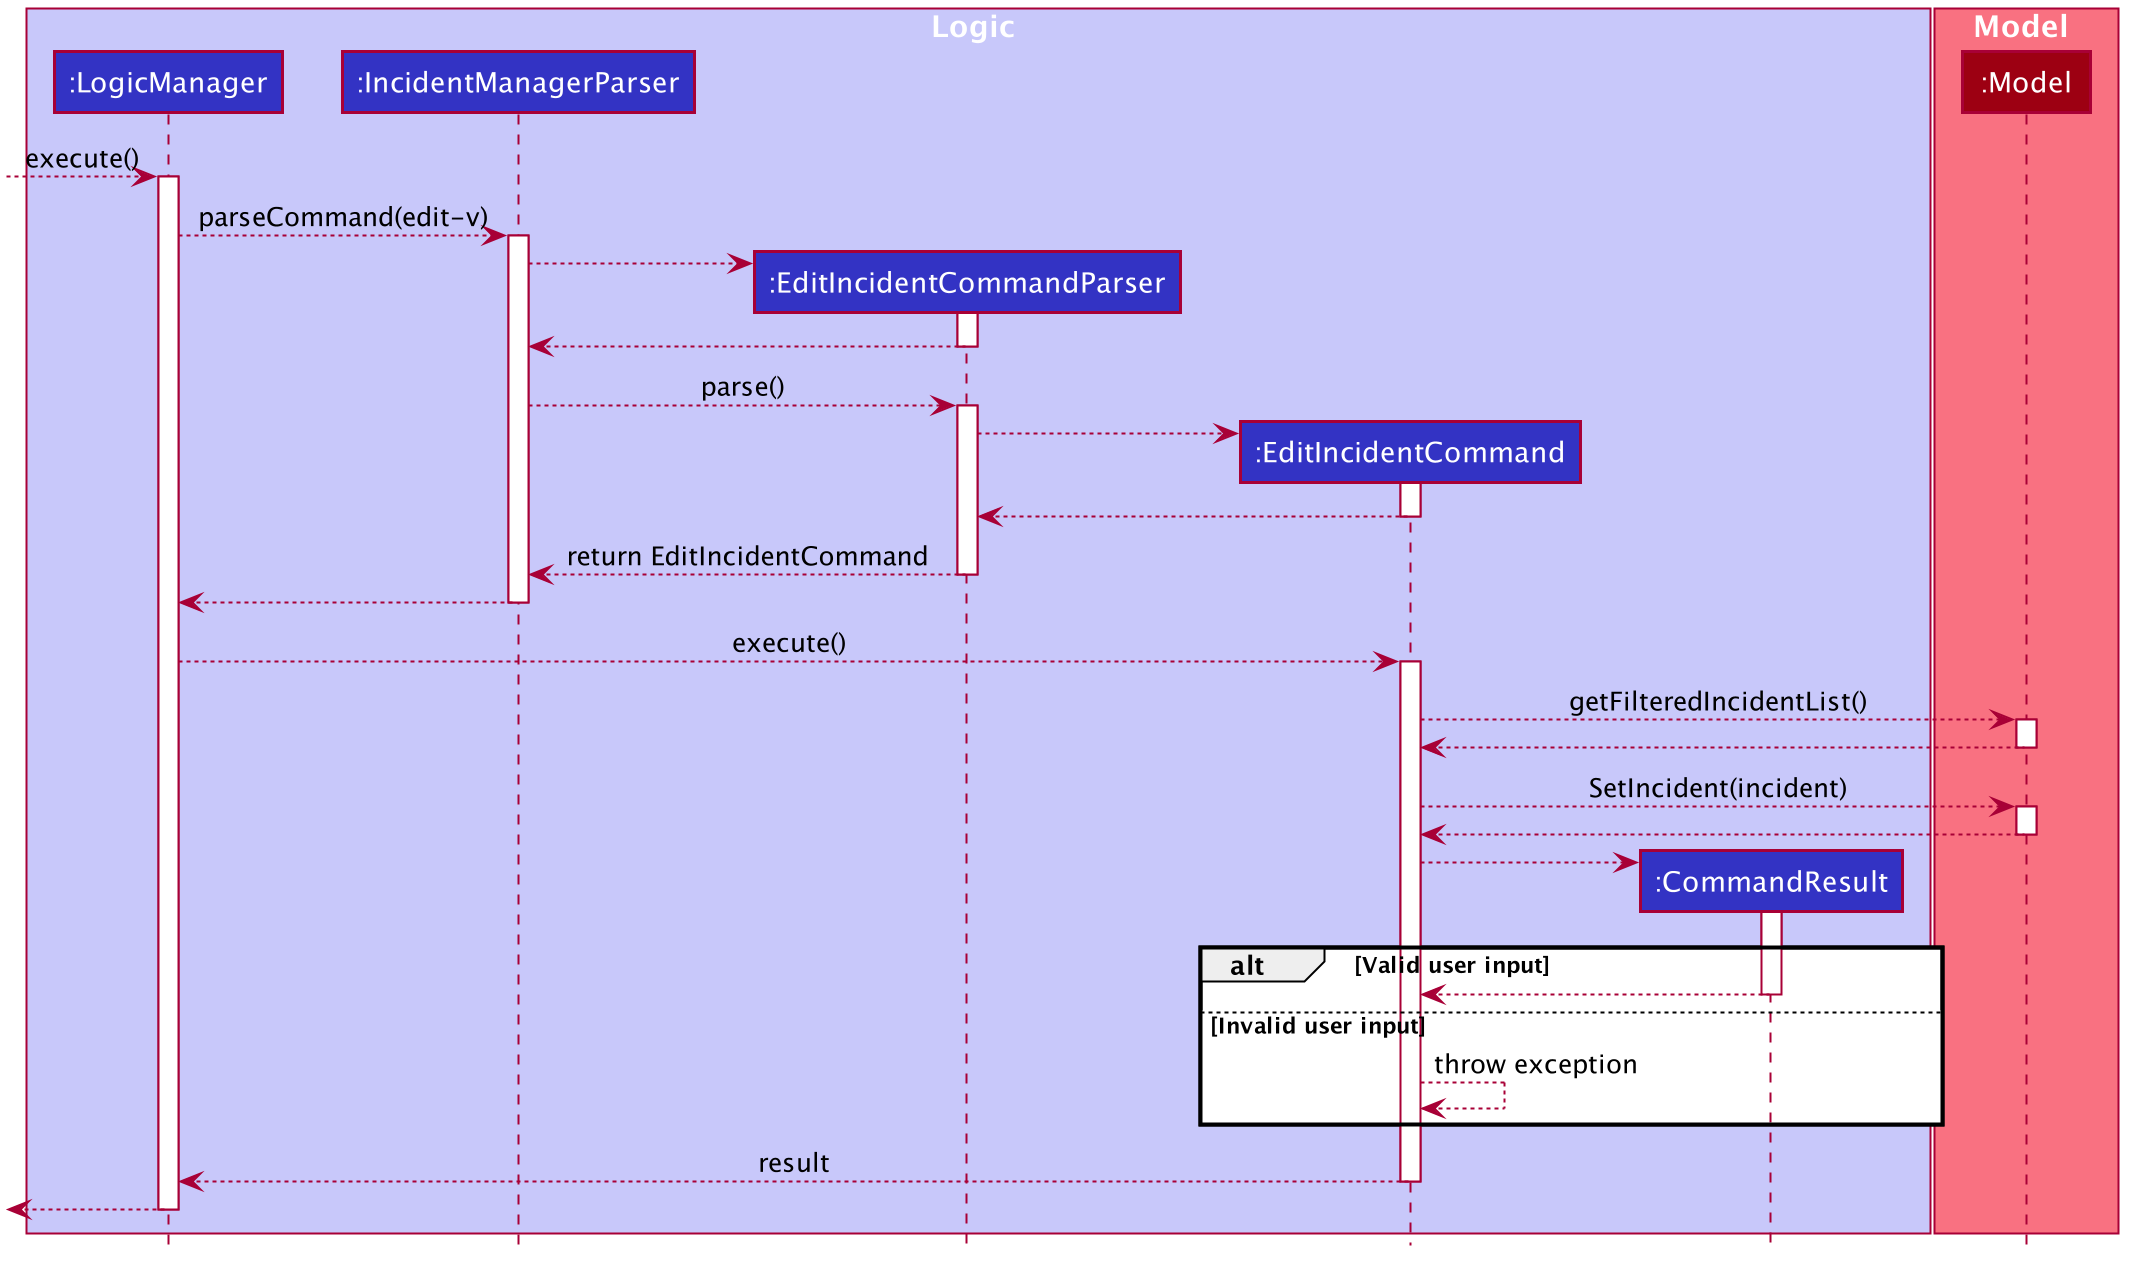
The command can only be used by admin accounts or accounts that created/filled/submitted the incident report. This is to prevent sabotage or accidental edits from operators who may not be familiar with the incident.
Design Considerations
Aspect: How incident edit executes
-
Current Choice: A new incident object with edited fields is created and used to replace the old incident object in the list.
-
Pros: This reduces direct changes to incident objects, hence
EditIncidentCommanddoes not have access toIncidentinternal structure. This helps reduce content coupling between the 2 classes and also makes the program easier to test. -
Cons: A new
Incidentobject is created every time user input is valid, hence may require more memory to run. It also requires the usage of the “EditIncident” class, increasing the complexity of the codebase.
-
-
Alternative: Direct edit of the attributes of incident to be modified
-
Pros: Easier to implement. Less objects created and less classes involved in the function.
-
Cons: High coupling since
EditIncidentCommandwill need to have access to internal details ofIncidentclass in order to directly modify the contents of the object. This will cause the system to be harder to test and maintain.
-
Vehicle Management
Implementation
These are the commands available to the user related to vehicle management:
-
Changing the details of a vehicle:
edit-v -
Adding a new vehicle:
add-v -
Deleting a vehicle:
delete-v
Only vehicles with the status Avaliable are valid for editing or deleting. This is to prevent removing or changing the details of a vehicle that is currently being dispatched.
|
-
Only accounts with admin access are eligible to delete vehicles
Editing Vehicles: edit-v
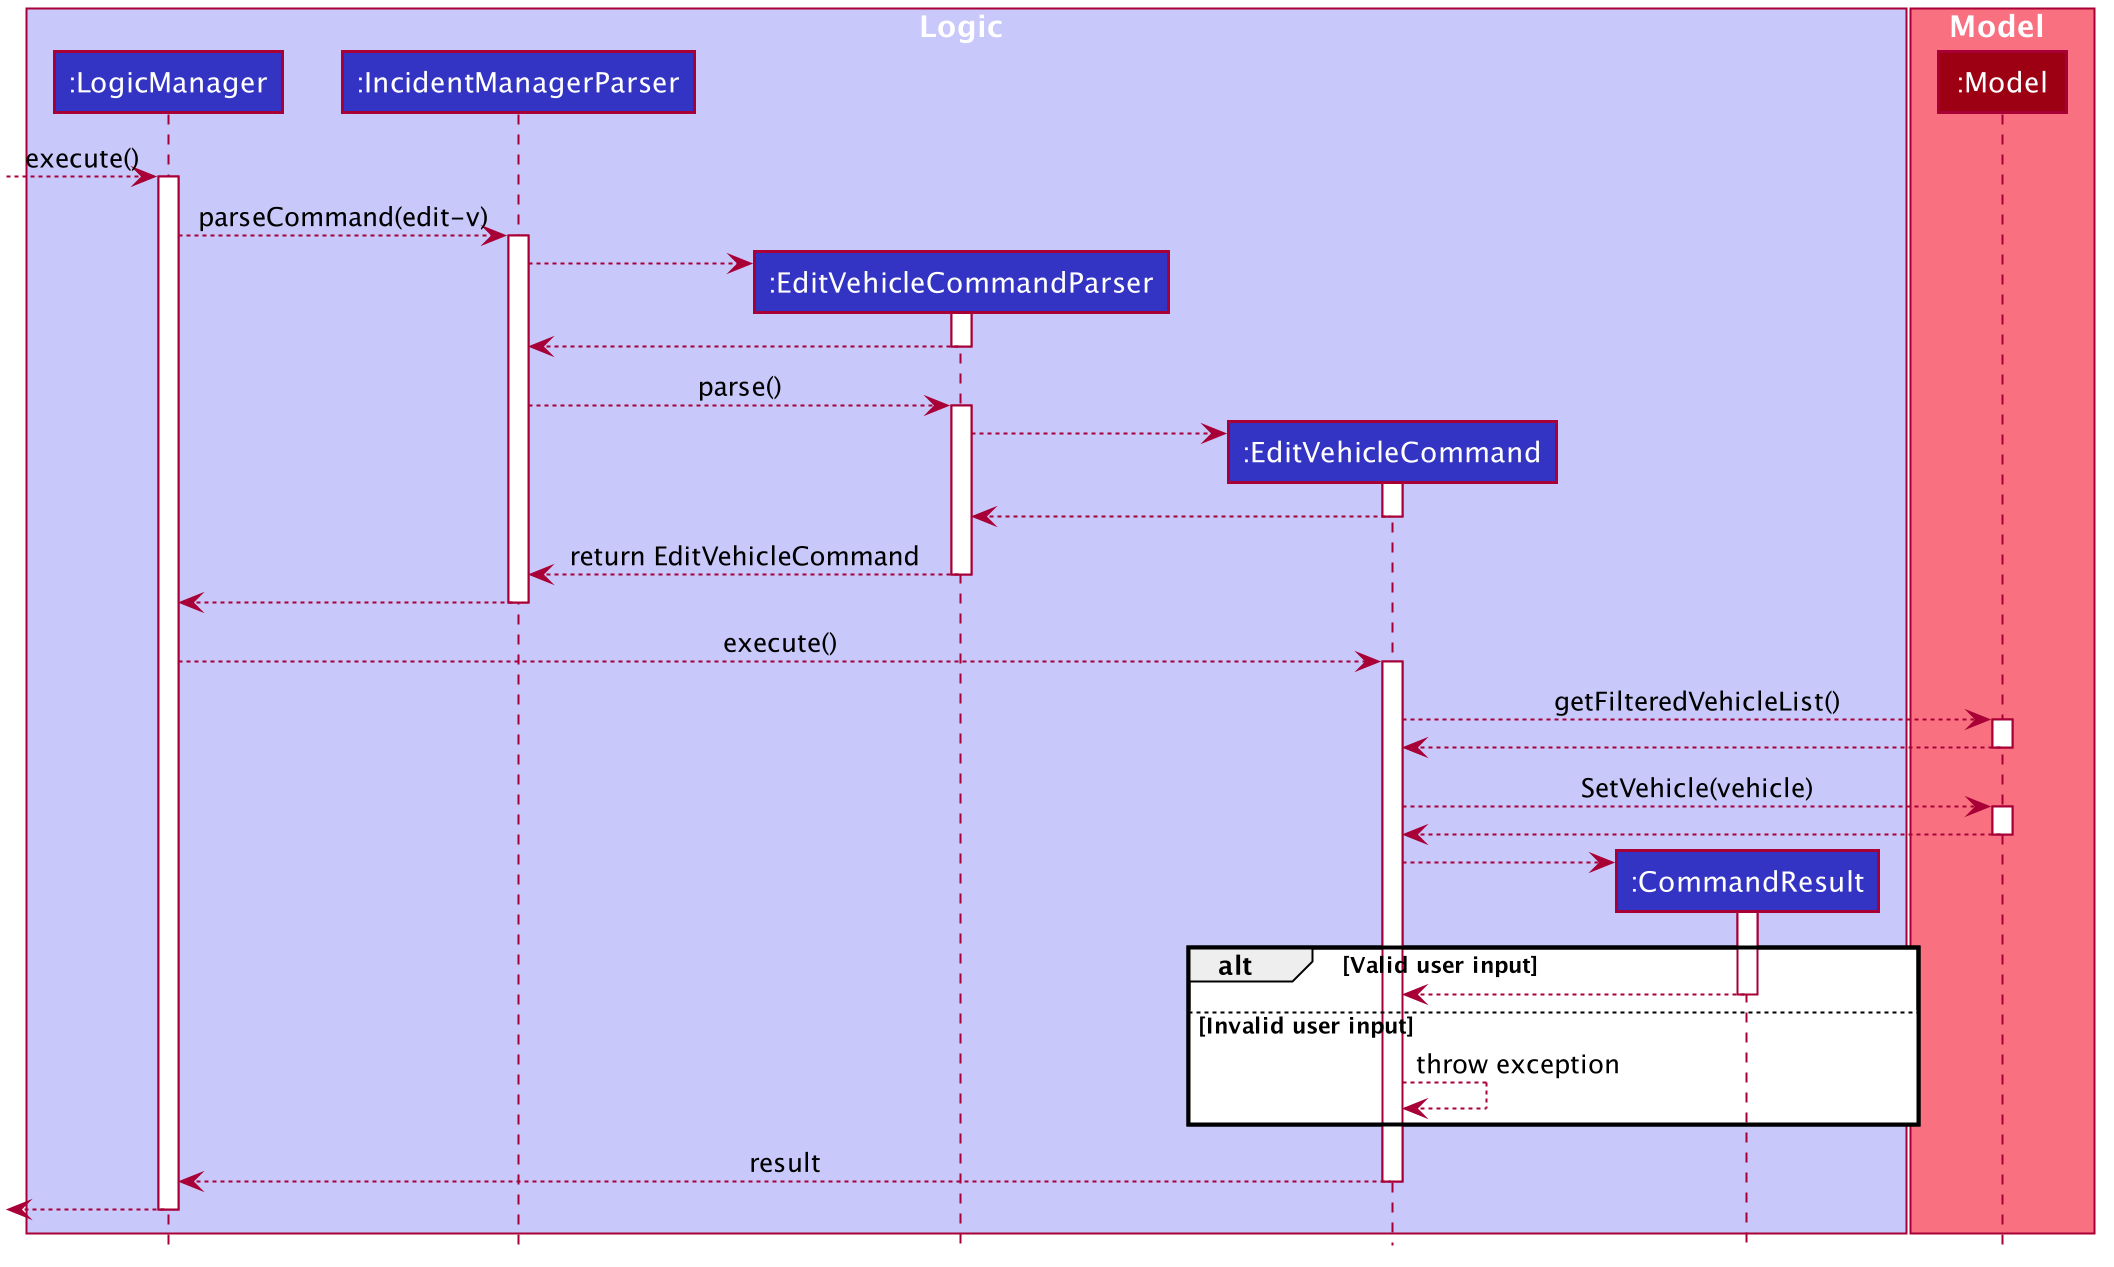
Implementation of edit-v is similar to edit-i where EditVehicleCommand makes use of EditVehicle class to create a new Vehicle object with the modified fields and replaces the original object. Design considerations are also similar to that of edit-i.
Below is a sequence diagram to illustrate the process and classes involved in the edit-v command:
Adding and Deleting Vehicles: add-v/delete-v
Design Considerations: Adding vehicles
-
Current Choice: new Vehicle object is created in the parser and
AddVehicleCommandtakes aVehicleobject in the constructor.-
Pros: compliant with principle of data abstraction since
AddVehicleCommandonly receives a vehicle object that needs to be added and does not need to know how the object is created. -
Cons: Vehicle object needs to be created in the parser. Increases coupling of parser and vehicle model.
-
-
Alternative:
AddVehicleCommandtakes in the fields from parser and creates theVehicleobject in theexecute()method ofAddVehicleCommandclass-
Pros: Vehicle object does not need to be created in the parser.
-
Cons: Constructor for
AddVehicleCommandandVehiclewill be highly similar and almost overlap in functionality. The parameters for creating a vehicle will have to be passed twice.
-
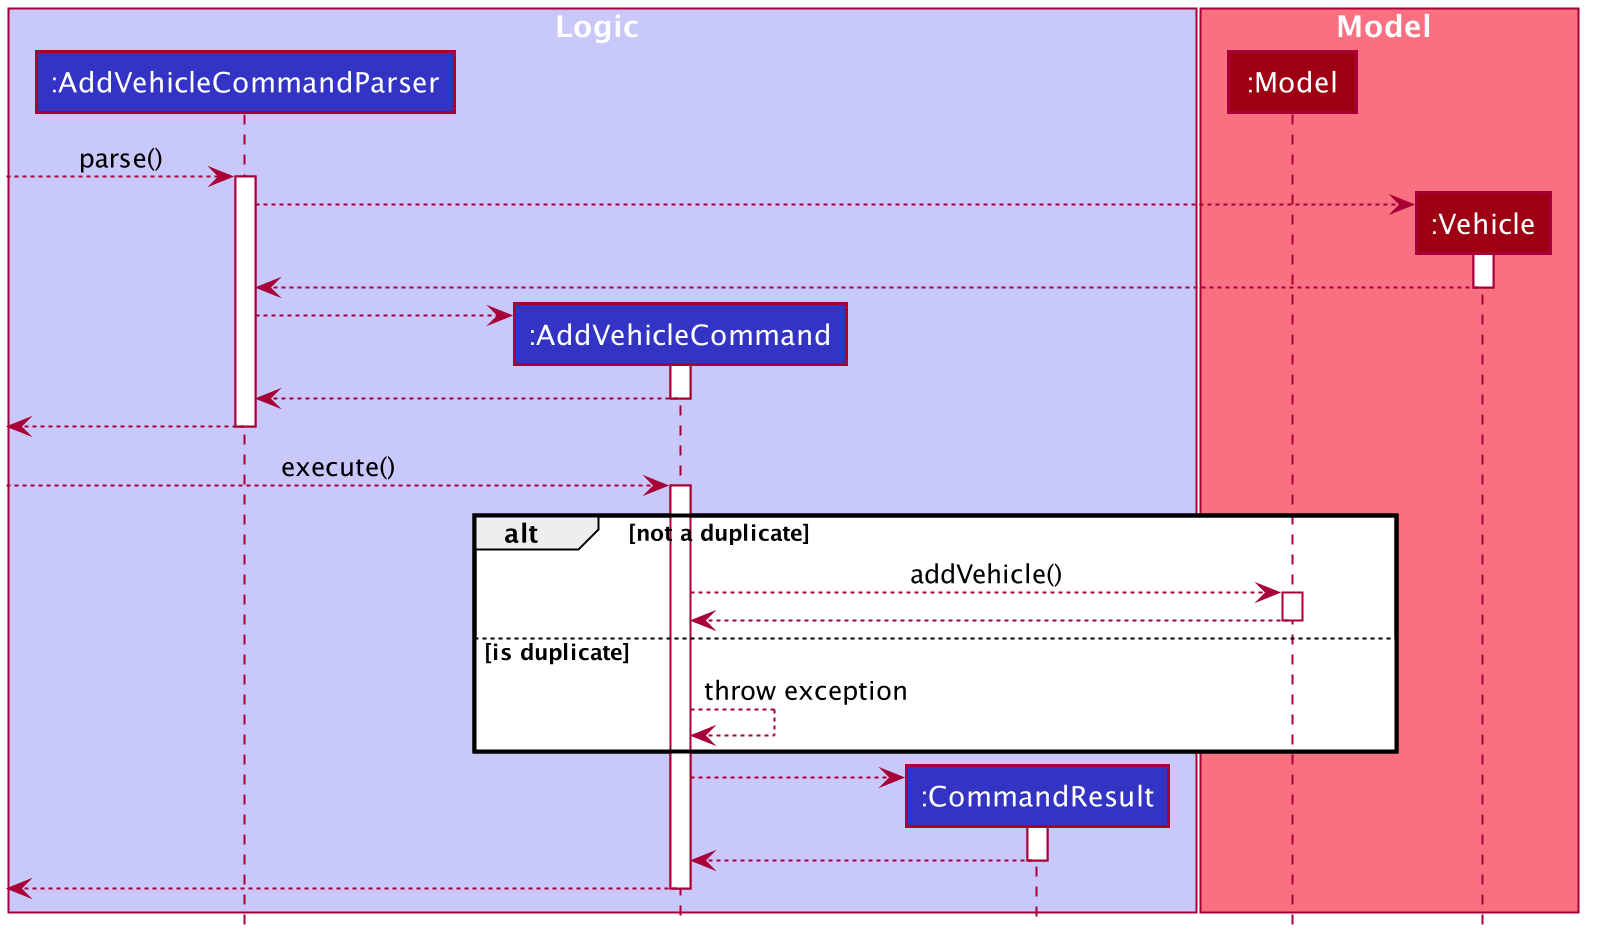
Below is a sequence diagram to illustrate add-v:
Design Considerations: Deleting vehicles
-
Current Choice: Vehicle object is taken from the list in model and
DeleteVehicleCommandtakes in theVehicleobject to be deleted and identifies it from the list using the signatures of the object.-
Pros: Reduces coupling. By passing a vehicle object instead of the index will mean that
DeleteVehicleCommandneed not know the state of the filtered vehicle list. -
Cons: Requires the vehicle list in to be unique and the signatures of
Vehicleobjects need to be specific. Methods fromModelManagerneeds to be access from bothDeleteVehicleCommandParserandEditVehicleParser. Increases coupling.
-
-
Alternative:
DeleteVehicleCommandcan take in the index of the vehicle to be deleted and delete from the list by identifying the vehicle using the index.-
Pros: Easier implementation
-
Cons: DeleteVehicleCommand needs to know the state of the filtered list. Increases coupling.
-
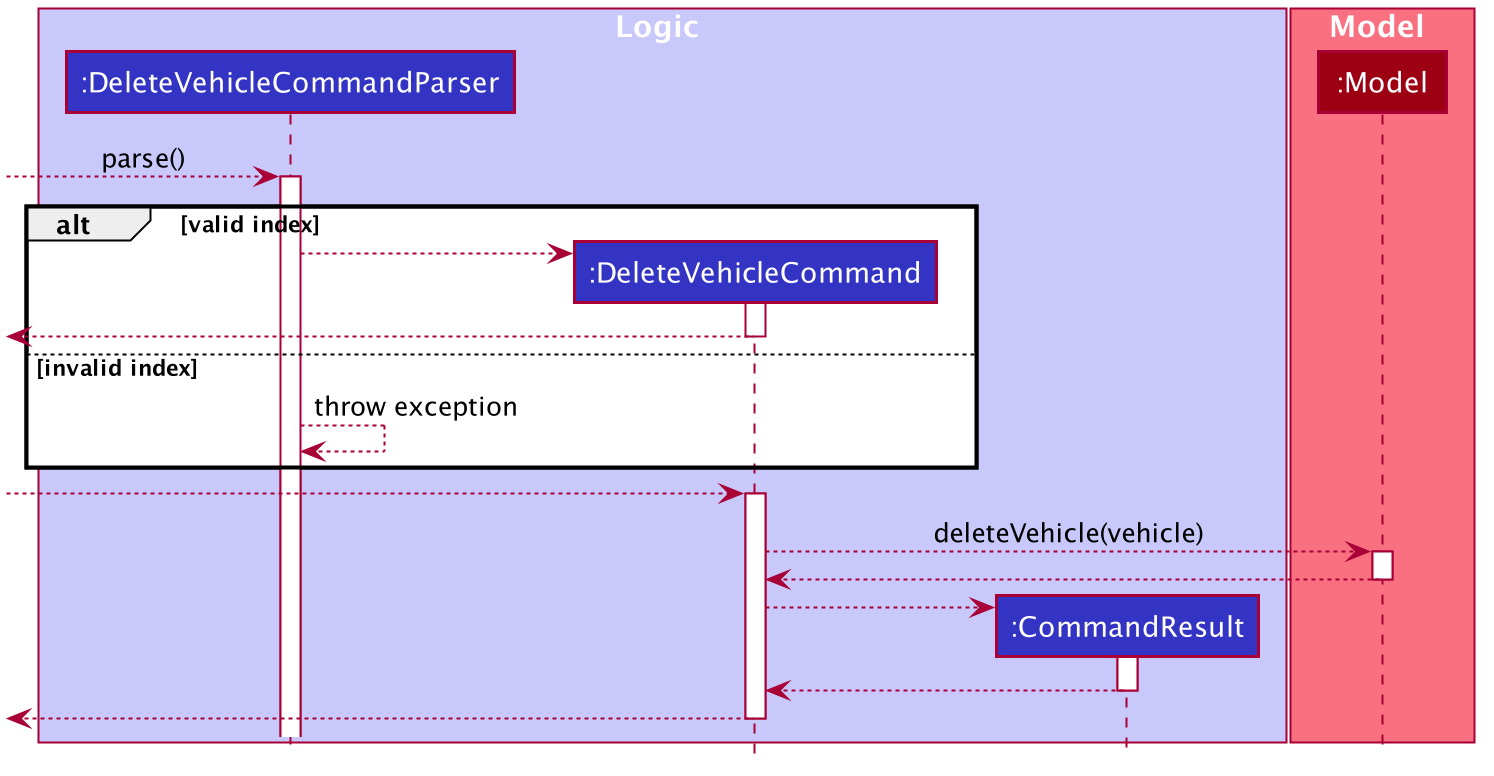
Below is a sequence diagram to illustrate delete-v:
Contributions to the User Guide
Given below are sections I contributed to the User Guide. They showcase my ability to write documentation targeting end-users. |
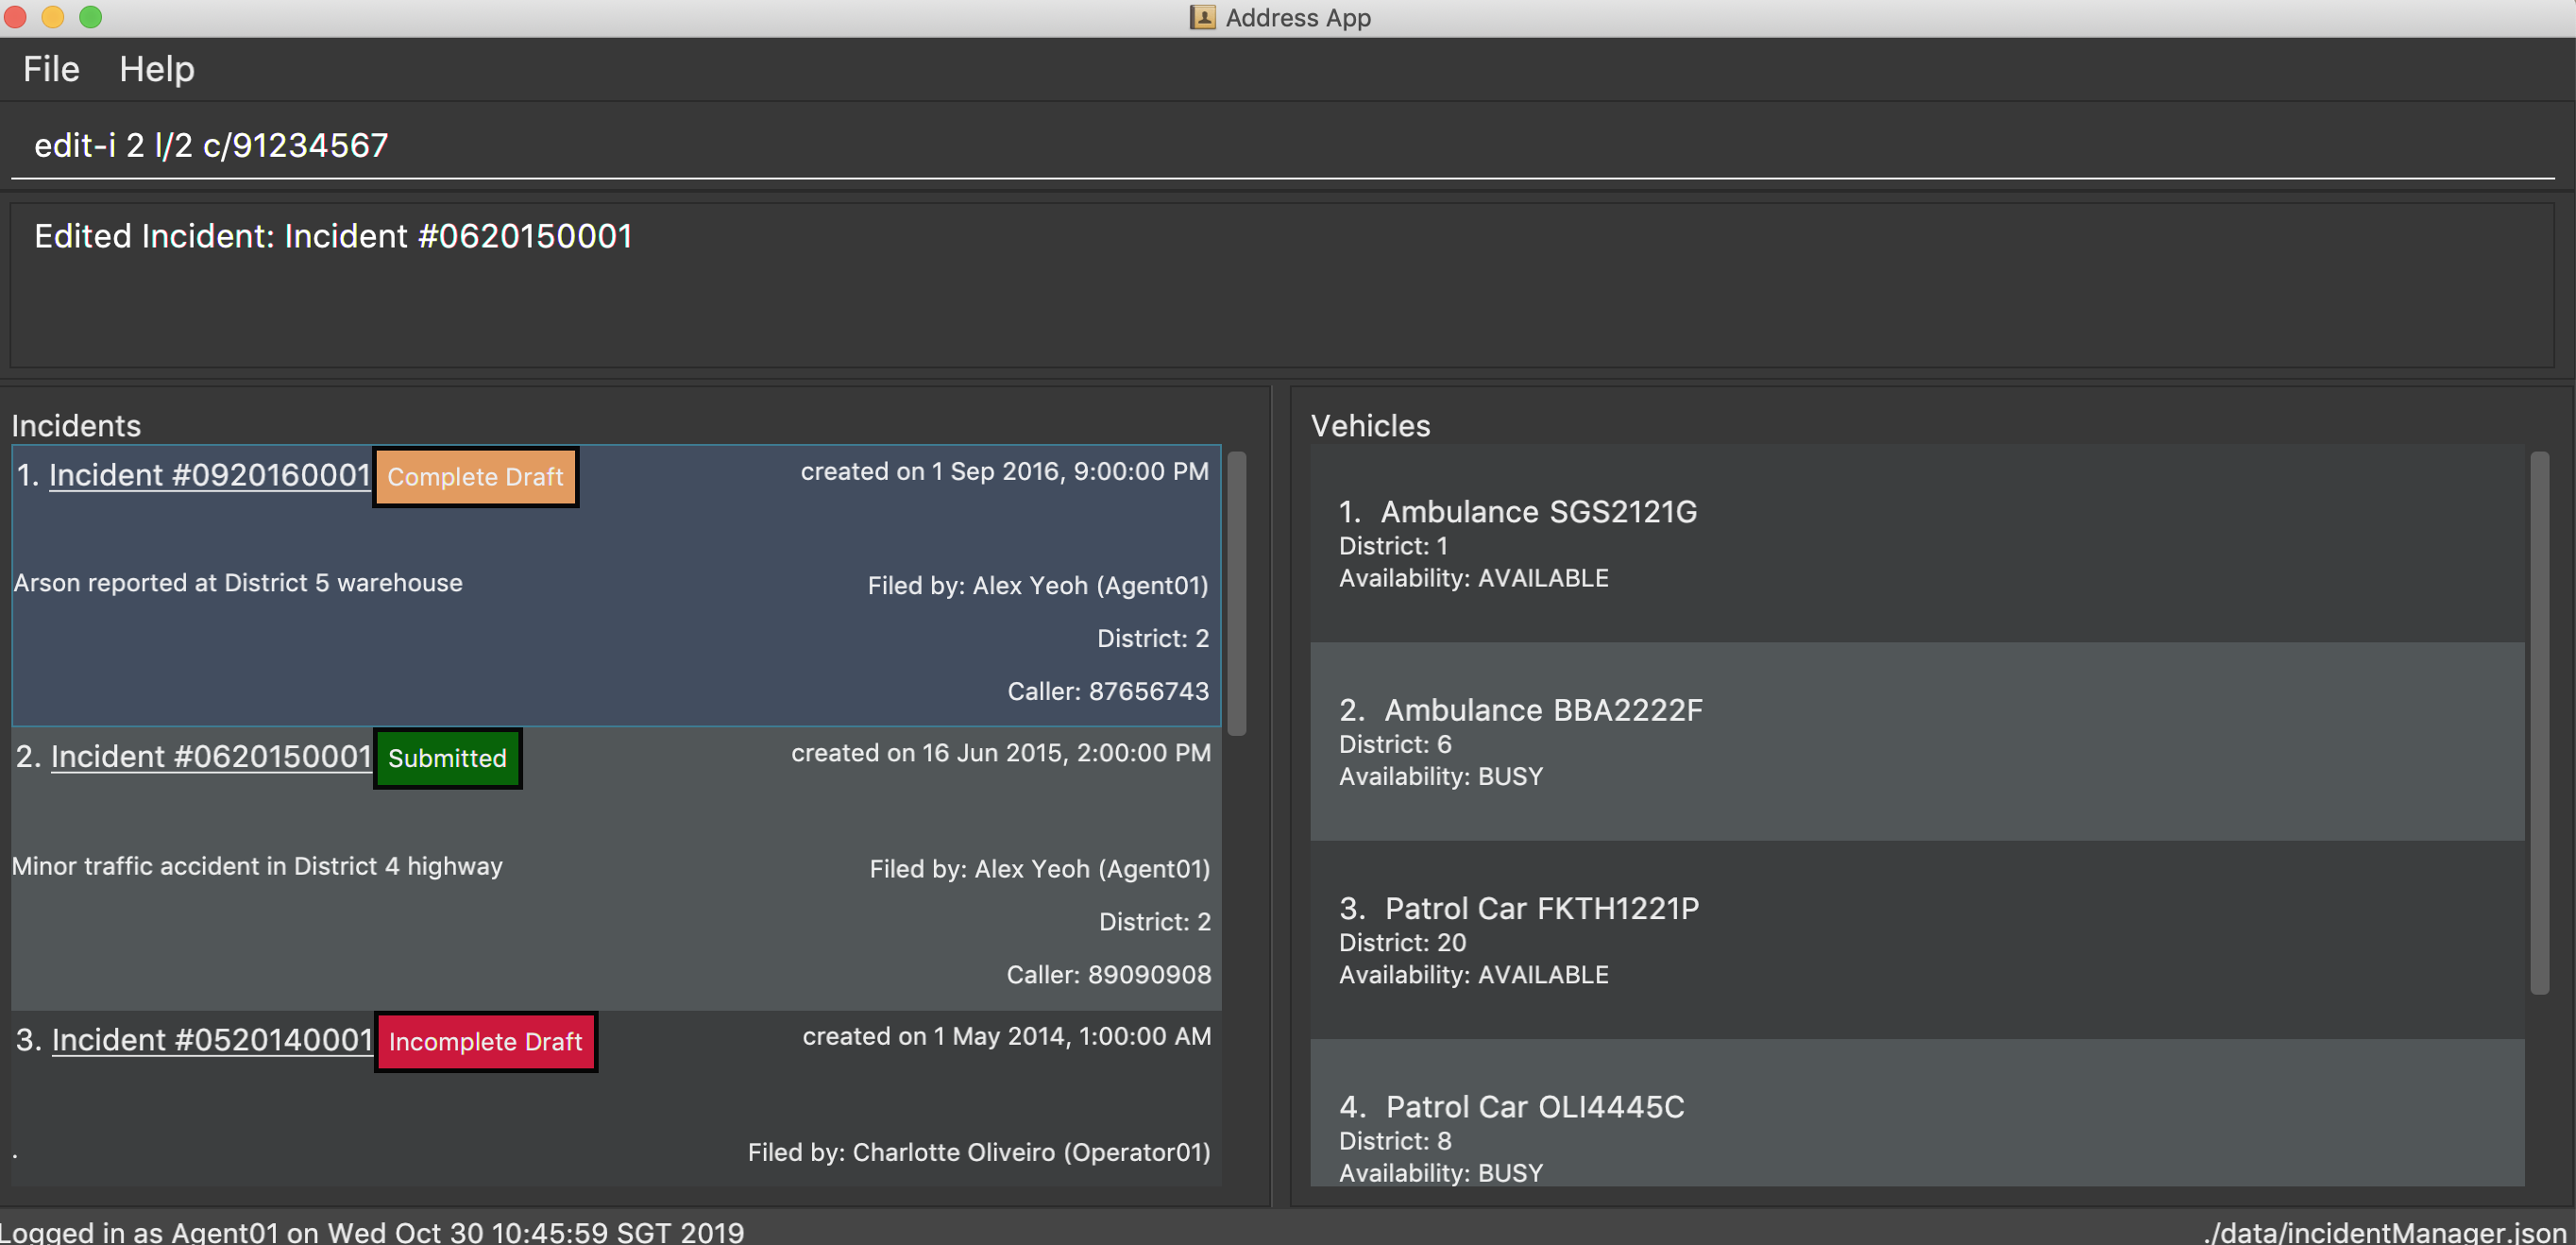
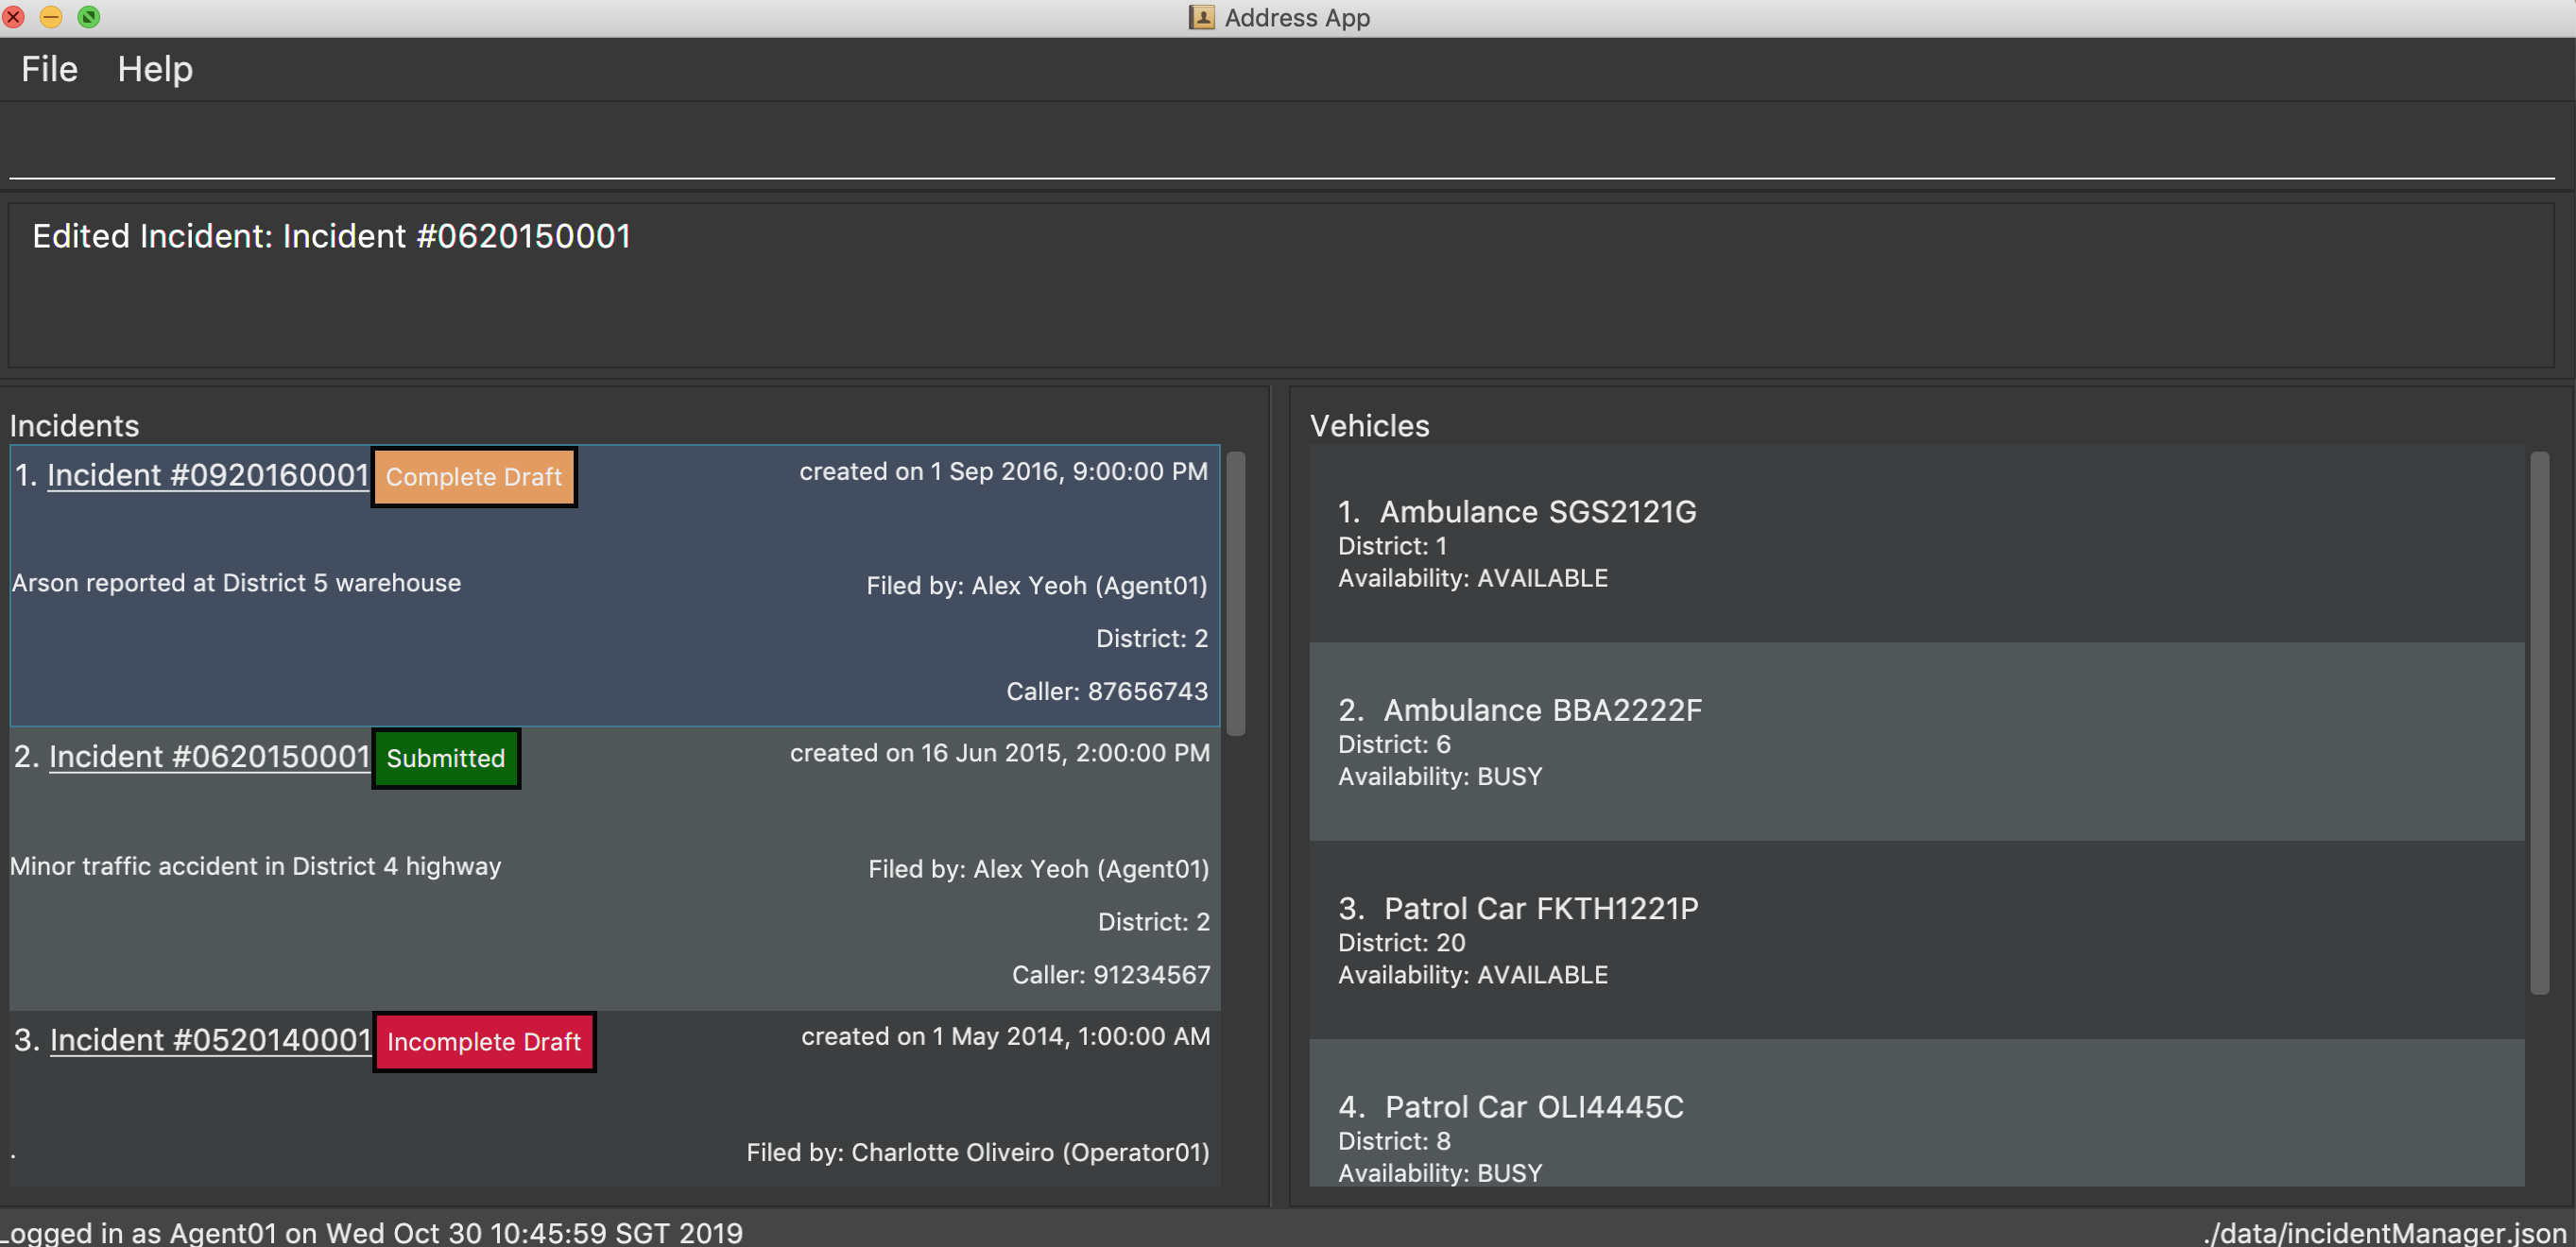
Editing an Incident: edit-i
Edits an existing incident in the Incident Manager as identified by the index in the display.
Format: edit-i [INDEX] [dist/DISTRICT] [p/CALLER NUMBER] [desc/DESCRIPTION]
Example of input:
-
edit-i 1 dist/2 desc/This is an incident description.-
result: only district and description is changed.
-
-
edit-i 1-
result:
No new fields were provided, incident is not edited.
-
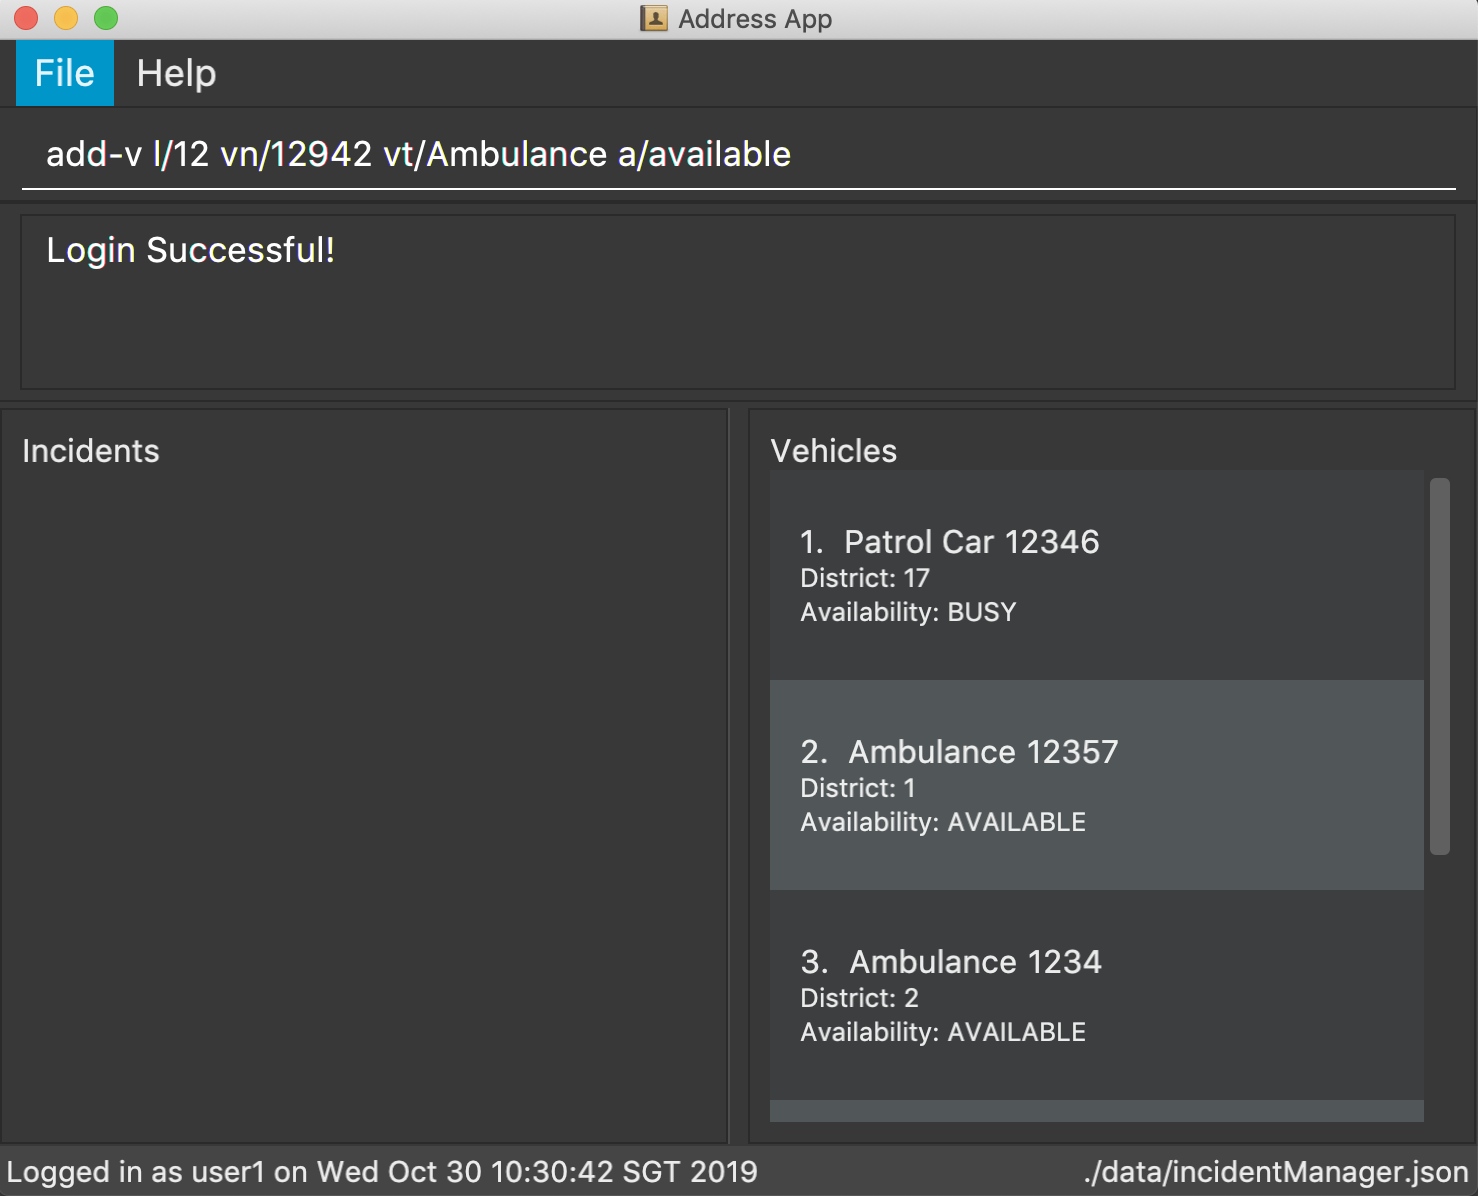
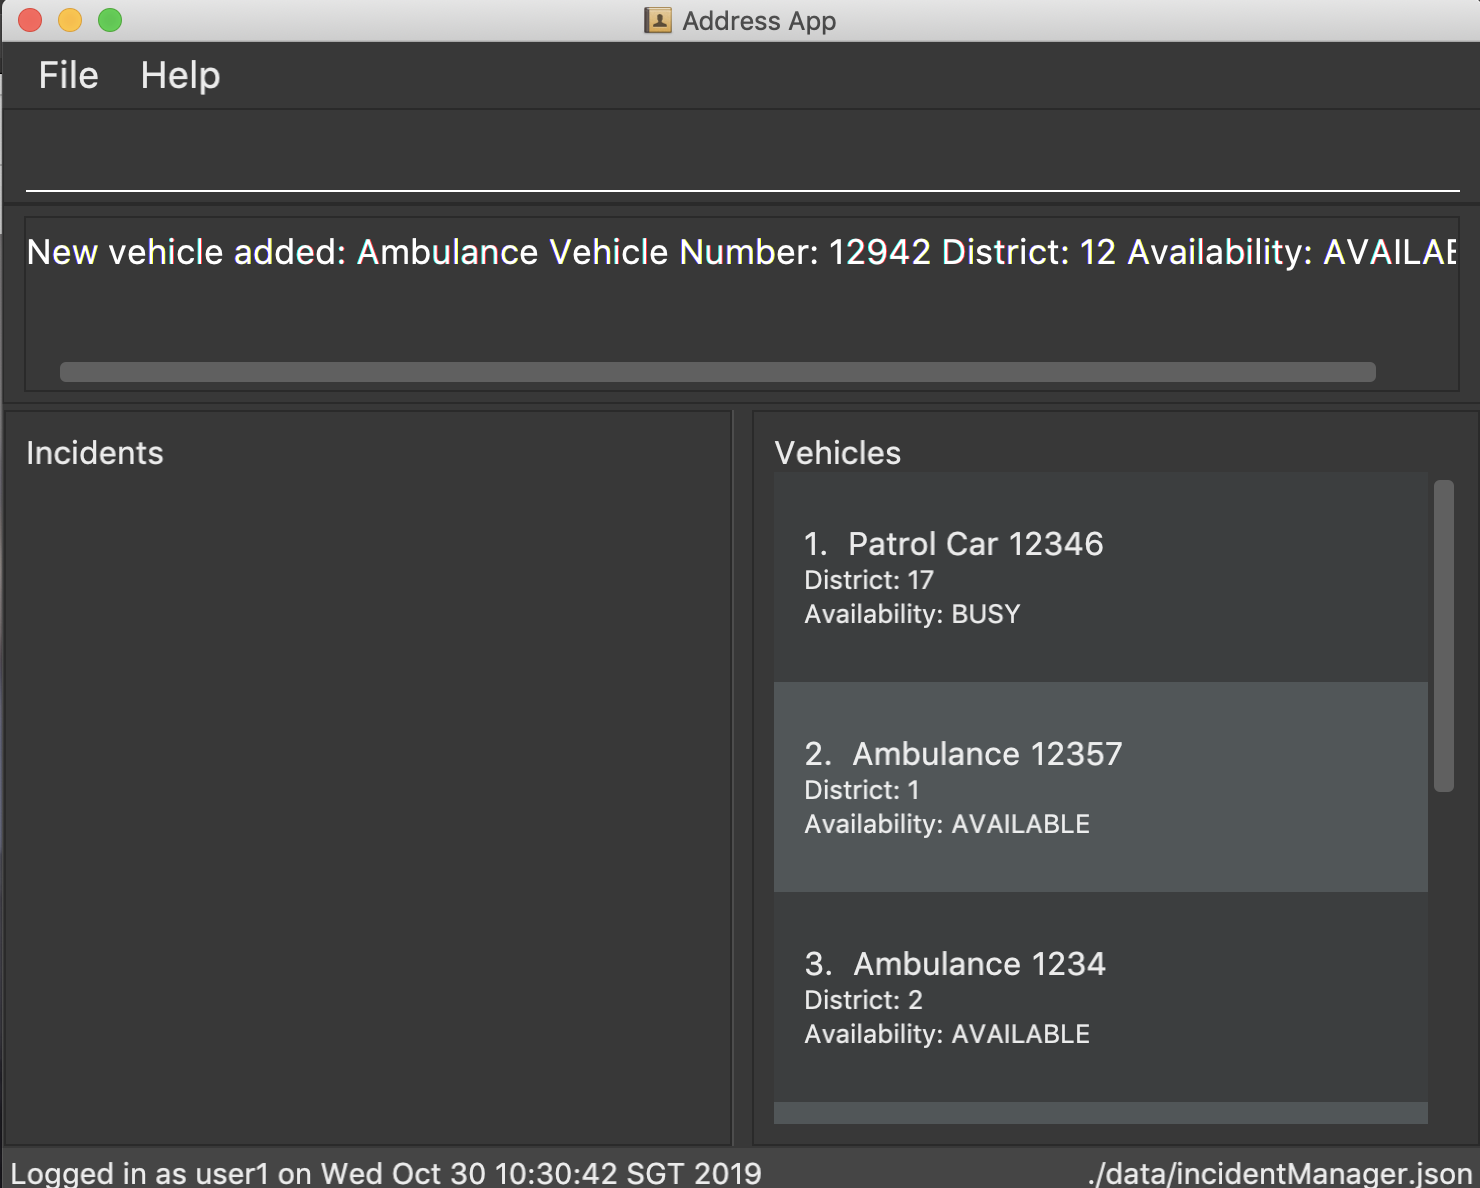
Adding a Vehicle: add-v
Adds a vehicle into the Incident Management System.
Format: add-v [dist/DISTRICT] & [vnum/VEHICLE NUMBER] & [vtype/VEHICLE TYPE] & [a/AVAILABILITY]
| All fields must be provided in order to make a valid addition to the Incident Management System. If any of the fields are missing, vehicle will not be added. |
Examples:
-
add-v dist/2 vnum/SFD1234A vtype/Ambulance a/available-
result:
New vehicle added: Ambulance Vehicle Number: 12345 District: 2 Availability: AVAILABLE
-
-
add-v dist/12 vnum/SFD1234A vtype/Patrol Car a/busy-
result:
New vehicle added: Patrol Car Vehicle Number: 23456 District: 12 Availability: BUSY
-
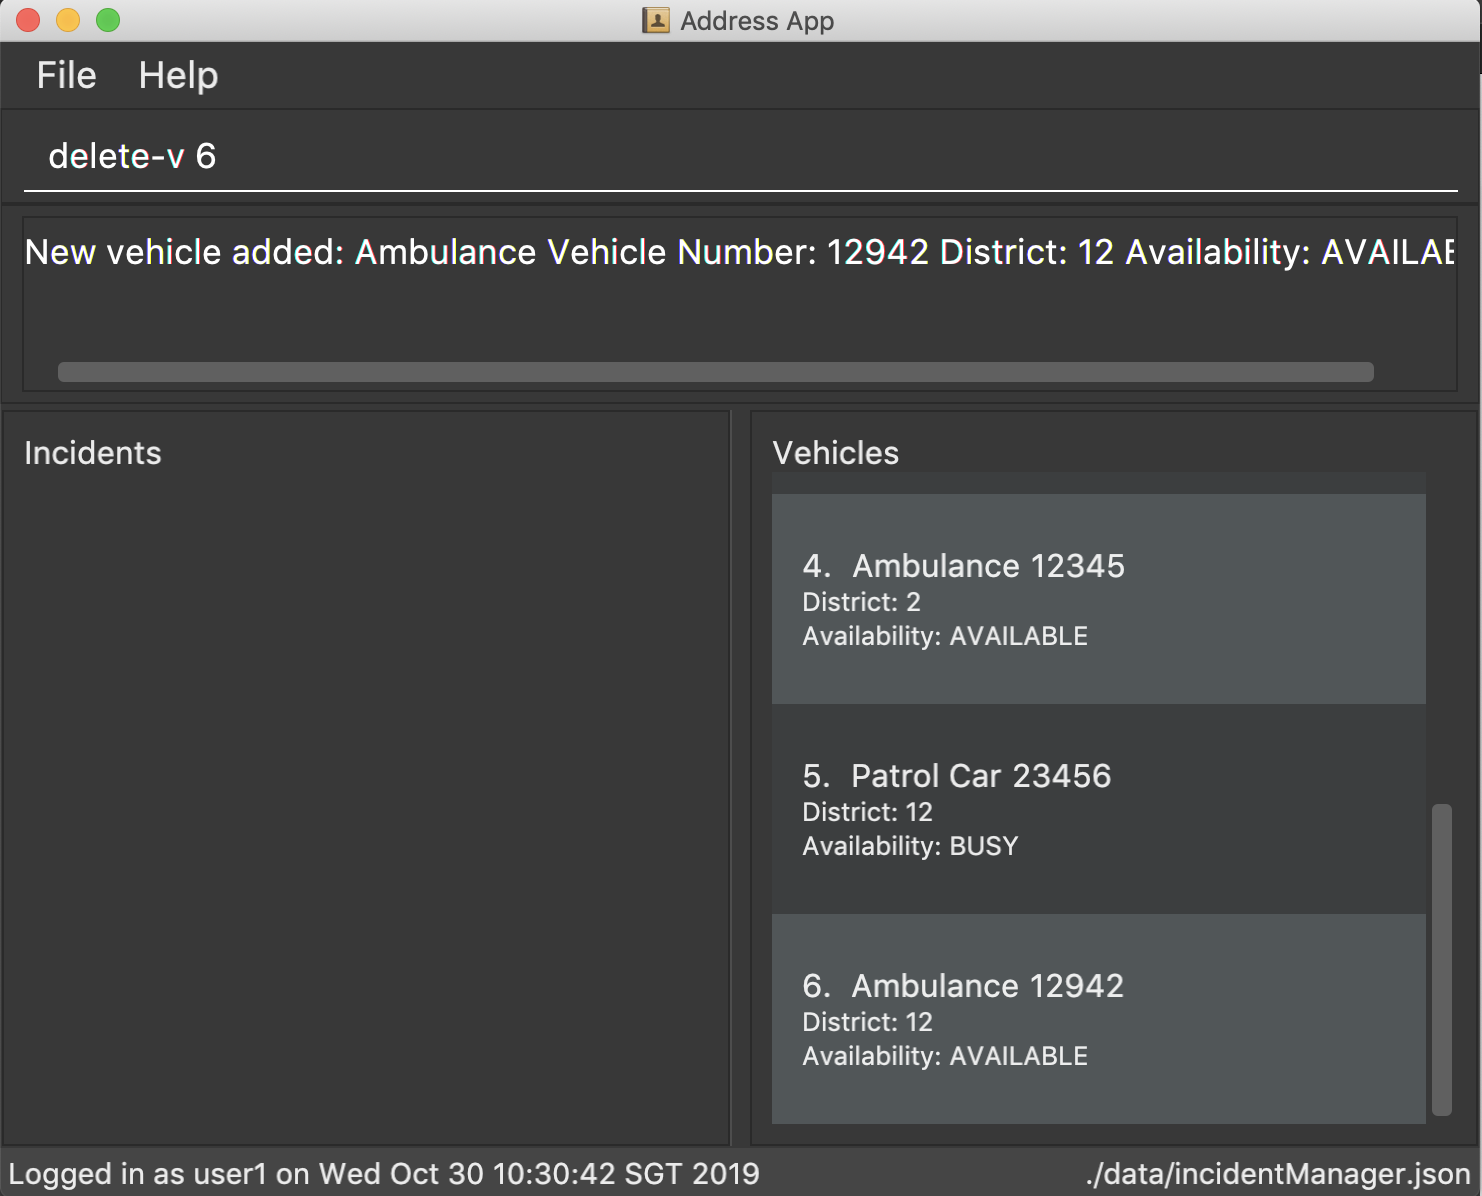
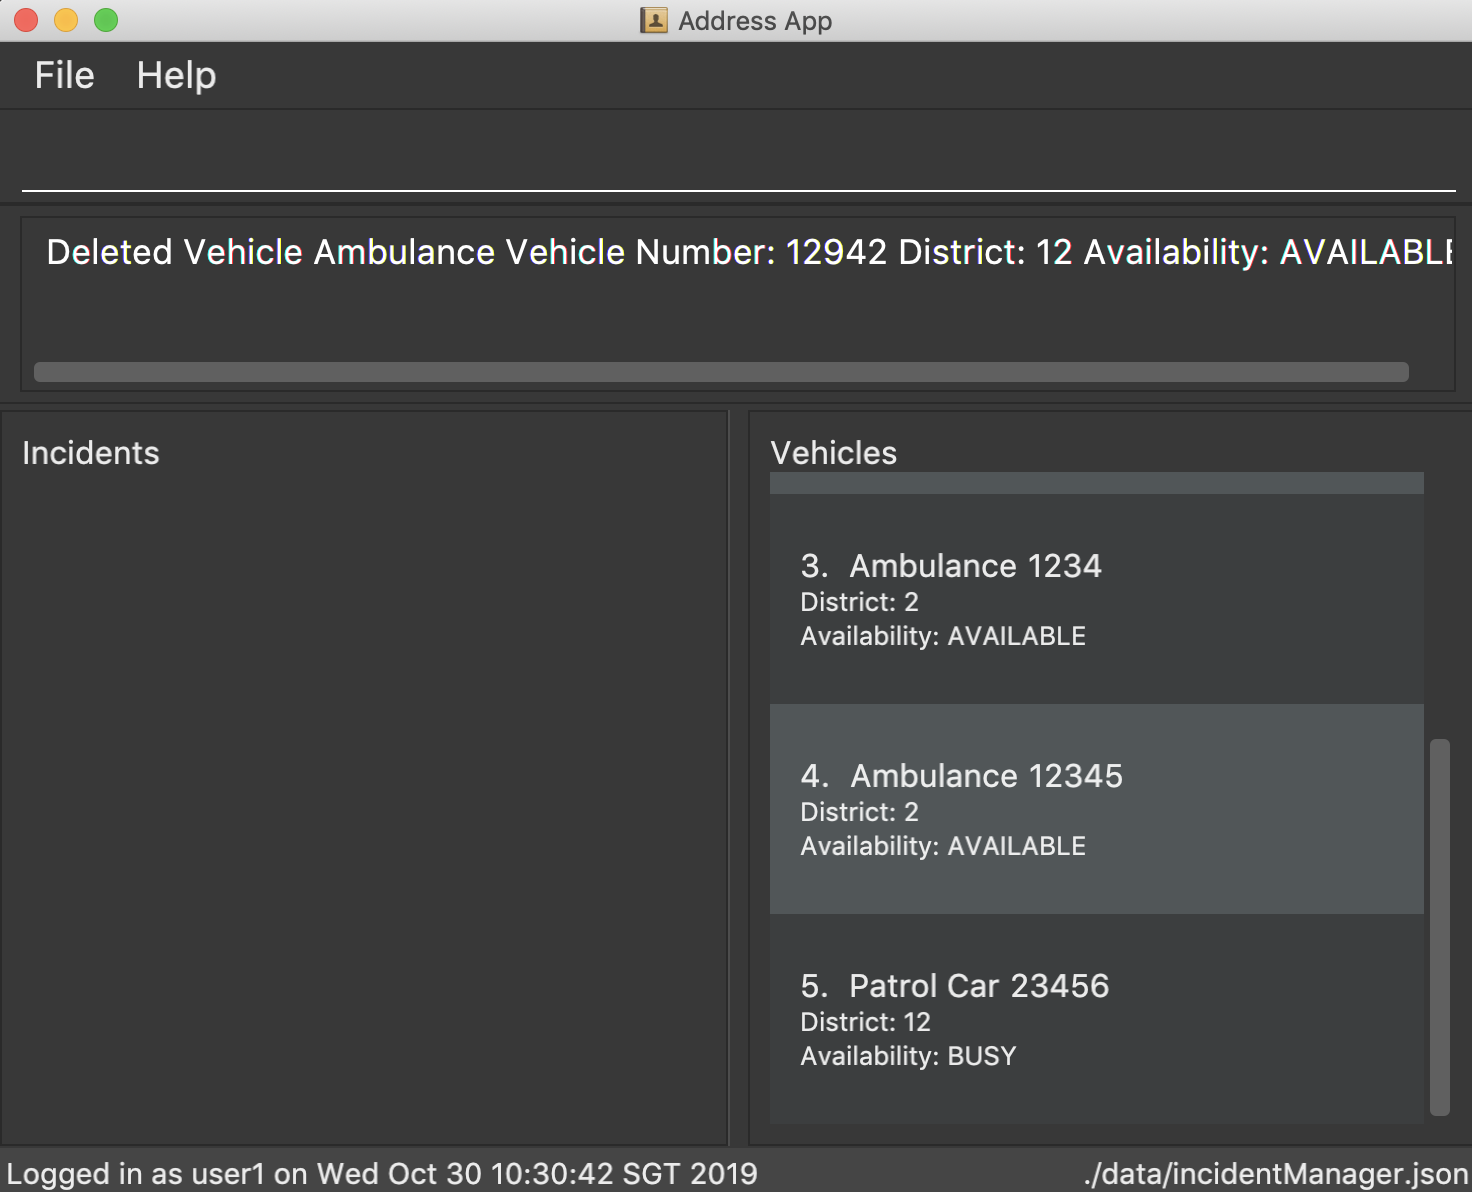
Deleting a Vehicle: delete-v
Deletes a vehicle in the list as identified by the index.
Format: delete-v [INDEX]
